- Home Style Daily
- Weekend Projects
- Painting a brick fireplace without regretting it later
Painting a brick fireplace without regretting it later
Update your living room with these practical fireplace paint ideas, covering the right way to clean, prime, and coat brick for a lasting finish.
Ideas from Vaughn Trimble
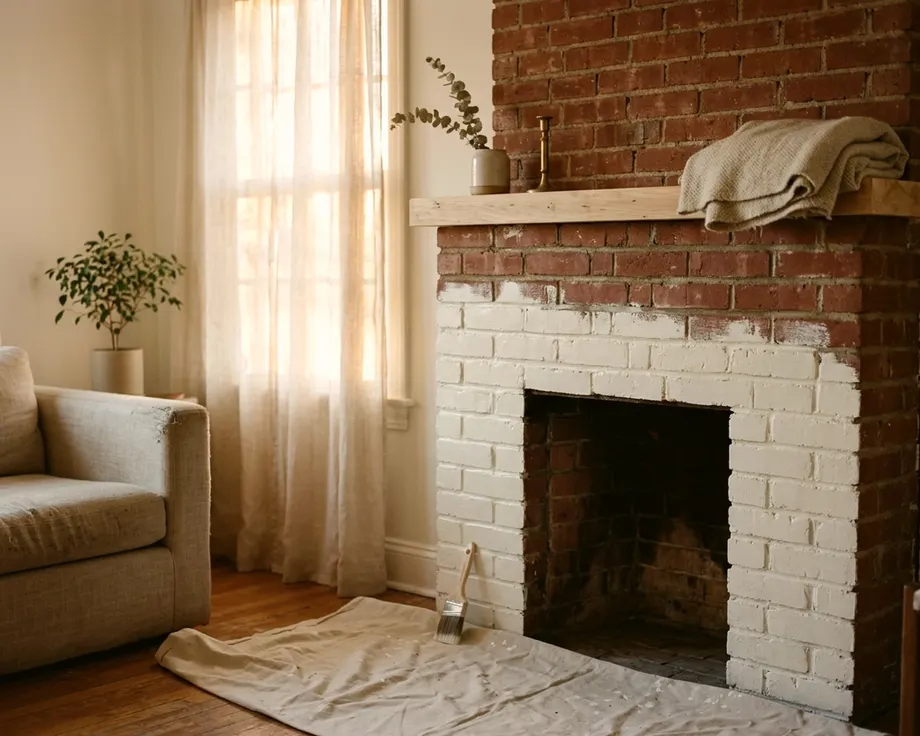
Painting a brick fireplace changes the entire feel of a living room. A fresh coat covers dark masonry and brightens the space immediately. Paint is very hard to remove from porous brick and needs proper prep work to look smooth. A thorough cleaning and a coat of primer help the new color go on evenly and stay put.
Weighing a painted fireplace against natural brick
Painted brick is a permanent choice. Stripping paint from porous masonry can take harsh chemicals and a lot of scrubbing. Decide if you truly dislike the natural brick before opening a can.
Natural brick fits beautifully in older homes. Sometimes a deep clean restores the original charm. If the brick still looks gloomy after a good scrub, paint offers a clear path forward.
A solid coat of color makes a heavy fireplace fade into the background. It works well on common brick. The smooth finish provides a clean backdrop for simple decor.
Checking the masonry for loose mortar
Inspect the fireplace closely before buying supplies. Old mortar can turn to powder over time. Rub a hand across the joints to see if sand falls away. Loose mortar ruins a fresh paint job.
Patch any crumbling spots with concrete filler and press it firmly into the gaps. Smooth it out with a damp sponge. The patched areas must dry completely before you begin cleaning. Paint highlights structural flaws rather than hiding them.
Look for chipped or cracked bricks. Small chips add texture and look fine when painted. Large cracks might need a masonry patch or a check by a licensed mason. A solid surface holds primer perfectly and prevents peeling down the road.
Gathering your supplies
A successful paint job requires specific tools meant for rough surfaces. Flimsy brushes wear out against coarse brick. Standard drywall rollers fail to push paint into deep mortar lines. Gather these items before starting the project:
- Heavy canvas drop cloths to protect the hearth and floor
- A stiff bristle brush for scrubbing soot off the masonry
- Stain-blocking primer made specifically for porous brick
- Thick nap roller covers and a sturdy roller frame
- Stiff nylon paint brushes for cutting in around edges
Protecting the floor and surrounding walls
Preparation saves your floors from permanent stains. Brick absorbs paint quickly and causes heavy splatter. Clear all furniture away from the hearth. Pulling a chair back to an empty living room corner keeps it safe from stray drips.
Lay heavy canvas drop cloths over the floor. Tape the edges firmly against the base of the hearth. Plastic sheets tear easily under a ladder and trap wet paint on top. Canvas absorbs stray drips safely.
Wrap the mantel tightly with painter's tape. Press the edges down hard to seal out liquid. Cover the surrounding wall edges if you plan to use a contrasting color. Good tape lines make the final result look sharp.
Scrubbing away years of soot
Masonry holds onto ash, dust, and natural oils from wood smoke. Paint slides right off a greasy surface. Cleaning the brick is a miserable job that helps the finish last.
Use a stiff scrub brush and a degreaser, wear gloves and eye protection, and follow the label. Standard dish soap may lack the power to cut through thick soot. Work from the top down to chase dirty water toward the hearth. Scrub the mortar joints vigorously.
A wire brush removes stubborn black marks above the opening. Apply heavy pressure to pull dirt out of the deep pores. The brick should feel rough and clean to the touch.
Rinsing and drying the masonry
Cleaning leaves behind a film of dirty soap. Primer fails to bond with chemical residue. Rinse the entire fireplace with clean water.
Use a large grouting sponge and a bucket of warm water. Wipe every brick and mortar line. Change the water frequently as it turns gray. A clean surface absorbs the primer exactly as intended.
Brick acts like a giant sponge. It can hold water deep inside. Wet masonry can reject primer and cause blistering. Let the fireplace sit bare until it is completely dry.
Choosing a primer for porous surfaces
Standard drywall primer soaks into brick and disappears. Masonry demands a heavy, stain-blocking primer. A quality primer seals the pores and creates a smooth base for the topcoat.
Look for a high-adhesion primer designed for brick. It helps stop old soot stains from bleeding through the final paint. White primer works best under bright colors. Tint the primer gray if you plan to paint the fireplace a dark color.
Applying primer to rough brick
Applying primer takes patience and a thick roller cover. A heavy nap roller pushes liquid deep into the rough surface. Roll the primer on generously. Keep the roller moving slowly to avoid excessive splatter.
The roller will miss the recessed mortar lines. Follow up immediately with a stiff nylon brush. Jab the brush into the mortar to coat every crevice. A solid, unbroken layer of primer is your main goal.
Watch out for thick drips along the bottom edge of the bricks. Brush them flat before they dry. Primer dries very hard and leaves visible ridges under the final coat. Let the primer cure fully according to the instructions on the can.
Finding fireplace paint ideas that fit the room
Choosing the right color changes the whole room. Good fireplace paint ideas usually start with the wall color. Matching the fireplace to the walls can make a small room feel larger. It stops the eye from jumping between contrasting blocks of color.
Bright white is a classic choice. It highlights the natural texture of the brick while reflecting light into the room. A soft, warm white avoids looking harsh against wood floors. Dark charcoal or deep green creates a bold, moody focal point.
Glossy finishes highlight every bump and flaw in old masonry. A flat or eggshell finish hides imperfections nicely. Eggshell provides a slight sheen that wipes clean easily when dust settles. Flat paint feels a bit chalky and holds onto dust over time.
Painting the outer surround
Many painters use standard interior paint on the outside of the fireplace, but check the paint label and the fireplace maker's guidance first. Areas close to the opening can get hot, so ask a qualified fireplace or masonry professional which paint is safe there.
Start by cutting in along the walls and the mantel. Use an angled brush to create a crisp line. Roll the face of the bricks with a fresh, heavy nap roller. Keep a wet edge to avoid visible lap marks.
Push the paint firmly into the mortar lines just like you did with the primer. Two coats usually provide solid, opaque coverage. Wait as long as the paint label says between coats.
Managing the inner firebox
The firebox holds the actual flames and takes direct heat. Standard house paint is not made for direct flame. Never apply regular wall paint to the interior walls of a working fireplace.
Leave the inner firebox bare. A clean, natural firebox contrasts beautifully with a freshly painted surround. Once the firebox is completely cool, sweep out the ash and scrub the interior bricks with plain water.
If the inner bricks look awful, you have limited options. A specialized high-heat paint made for fireplaces may be an option. Follow the label and ask a qualified professional before using it in a working firebox. Standard black high-heat paint masks soot and visually recedes into the shadows.
Curing the finish before building a fire
Paint can feel dry to the touch long before it has fully cured. High heat from a fire can bubble soft, uncured paint. Wait patiently before throwing logs on the grate.
Read the paint can to find the exact curing time. Waiting gives the finish time to harden and bond completely with the primer. Rushing this step ruins hours of careful labor.
Use the waiting period to clean up the room. Pull the tape off the mantel when the tape and paint labels advise, which helps avoid peeling the fresh paint. Store the leftover paint in a small jar for future touch-ups.
Putting the room back together
A freshly painted fireplace makes everything else look new. Roll up the drop cloths and move the furniture back into place. You might find yourself wanting to give a room a makeover to match the bright hearth.
When you begin decorating around a fireplace, keep the mantel styling simple at first. Let the clean lines of the painted brick stand on their own. A framed print or a few candles, kept well away from anything that burns, look great against a solid background.
Enjoy the updated space. The heavy, dark masonry is gone. The scrubbing and rolling leave you with a bright, welcoming living room.