- Home Style Daily
- Pretty Organizing
- Craft room ideas that keep supplies in sight and tidy
Craft room ideas that keep supplies in sight and tidy
Discover practical craft room ideas to organize your creative space so supplies stay easy to find, neat on the shelves and ready for your next project.
Ideas from Teagan Vosburgh
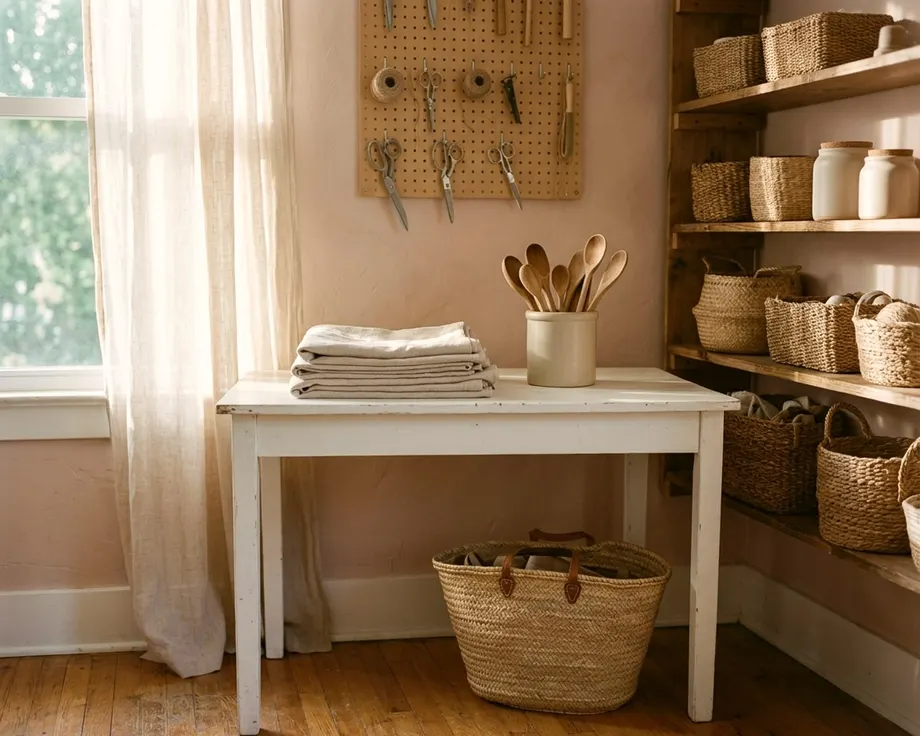
Good craft room ideas start with keeping your favorite materials visible and easy to reach. You can arrange a spare corner or a whole room to hold your supplies neatly. A well-planned layout means you spend less time searching for tools and more time making things.
Group your supplies by the project they belong to
Many crafters waste time digging past spools of thread just to find a hot glue gun. Storing items by their type seems logical at first. You might naturally put all your adhesives in the same bin. Group your supplies by the project they belong to instead.
Build a dedicated kit for each hobby. Group your watercolor tubes, small brushes, a water cup and heavy paper in a dedicated bin. Put yarn, knitting needles, a tape measure and stitch markers in another bin. A different box might hold your block printing ink, a brayer and carving tools.
This approach cuts down on setup time. You pull out a dedicated container and have everything you need. Less walking around the room means more focus on your art. A dedicated project box also makes cleanup fast because everything goes back into the same place.
You will have some tools that cross over between hobbies. Buy duplicate basics like scissors or rulers if you can. A dedicated pair of fabric scissors stays in the sewing box. A cheaper pair goes in the paper craft bin to save you from hunting for a shared tool.
Labeling boxes helps you identify contents from across the room. Use simple paper tags on string for wire baskets. Cardboard boxes take adhesive labels well. Keep the plain lettered labels facing outward on the shelf so you can read them at a glance.
Reviewing your kits every few months keeps them relevant. Remove tools you stopped using. Add the new materials you bought for a specific pattern. Your storage needs change as your hobbies change.
Keep your weekly craft tools at arm's reach
The things you use frequently belong right next to your chair. Reserve the prime space on your desk or the closest shelf for daily tools. You should be able to grab them without standing up, stretching far or twisting around.
Put your preferred pens, favorite measuring tape and a good eraser in an open cup. Keep this cup on your dominant side for an easy grab. Store small rulers, bone folders and craft knives flat in a shallow desk drawer. Keeping these tools close stops you from breaking your concentration.
Items you use rarely belong further away. Heavy equipment like a sewing machine or a large paper cutter can sit on lower shelves. Seasonal materials, like holiday wreath wire, should go on the very top shelf or out in a closet. Keeping rare tools out of your immediate workspace stops clutter.
A rolling cart offers another way to keep tools close. Park a metal utility cart next to your chair while you work. Roll it into a closet or an empty corner when you finish. A cart with wheels works perfectly for small apartments where a permanent desk takes up too much room.
The top tier of the cart holds your current tools and a good task lamp. The middle tier can hold a temporary trash bin or a bowl for fabric scraps. The bottom tiers handle the bulky materials for that specific hobby. You can spin the cart around to reach items on the back easily.
Display materials on open shelves with matching containers
Open shelves force you to keep things tidy. A messy clear plastic bin looks bad sitting out. Swap mismatched boxes for jars and baskets that look similar. A row of matching containers turns a pile of supplies into a nice display.
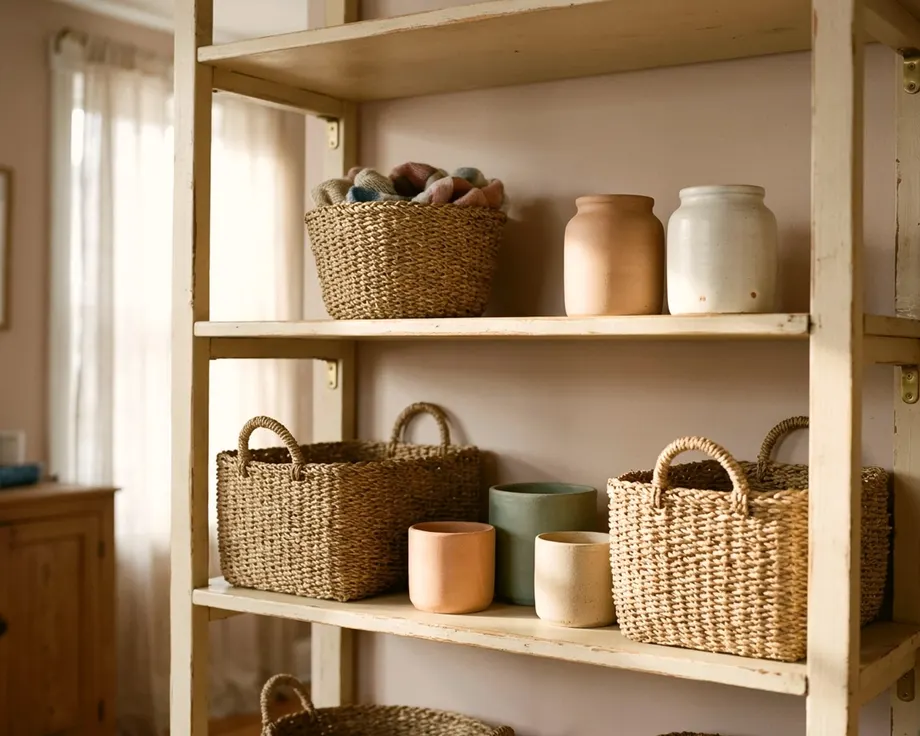
You end up with home organization that looks good enough to leave out. Use clear glass jars for small items. Buttons, beads, safety pins and embroidery thread look attractive through glass. Sorting these items by color makes the jars look like intentional decoration.
You can see exactly how much material you have left before starting a new project. Choose jars of the same height to make the shelf look planned. Wash out empty food jars for a free option. Glass cleans up easily and keeps dust off delicate supplies.
Opaque baskets hide the less pretty items. Scraps of fabric, tangled wire and partially empty glue bottles look chaotic in glass. Put them in woven baskets or solid canvas bins instead. The uniform outside hides the messy inside to give your craft room a calm feeling.
Make sure the baskets fit the depth of your shelves. A basket hanging over the edge looks messy and might tip over. A basket that sits too far back wastes valuable space. Measure your shelves before you buy any new containers.
A uniform color palette helps tie the room together. Pick white, black or a natural wood tone for all your solid boxes. Mixing too many bright colors on an open shelf strains the eyes. Keep the focus on your colorful art supplies instead.
Clear the work table and make a spot for resting projects
Your desk is for working, not for storage. Keep the surface completely bare when you are not actively making something. A clear table invites you to start a new project right away. A crowded desk makes starting feel like a chore.
Protect your work surface so you do not worry about spills. A self-healing cutting mat covers a large area and protects the wood from sharp blade cuts. A large sheet of tempered glass works well for painting and wipes clean easily. You can slip reference photos under the glass to keep them safe.
You need a designated spot to park half-finished work. Sometimes wet paint needs time to dry overnight. Wood glue needs time to set up properly, so check the label. Leaving these items on your main work surface blocks you from doing anything else in the room.
Set up a drying station on a separate small table or a wide, sturdy shelf. Move your wet or delicate items there carefully. This frees up your main desk. You can then start another task while the wet piece dries.
A simple wooden tray makes moving projects easy. Work directly on the tray for small items like jewelry, paper flowers or clay figures. Pick the whole tray up when you need a break. Slide it onto a lower shelf out of the way so your desk stays clear.
Consider adding a small folding table if you lack a permanent drying shelf. Pop it open when you start a messy stage. Fold it flat and lean it against the wall when the project wraps up. This keeps your floor space open most of the week.
Hang a pegboard to organize tools on the wall
Wall space often goes unused in a typical craft room. A pegboard turns a blank wall into useful storage. Hang it right above your desk to hold tools you need often. You can see everything at a glance without opening any drawers.
Install metal hooks for scissors, tape rolls and metal rulers. Use small hanging plastic buckets for pens, pencils and markers. The board keeps your hand tools off the desk but still within easy reach. A painted pegboard also adds a block of solid color to the room.
Just like you might give every tool a spot in a shed, a pegboard organizes craft supplies indoors. Mount the board into wall studs where you can so it holds its load safely. If you cannot hit a stud, use anchors rated for the weight and check the package label.
Move the hooks around as your needs change. A new hobby might require different tools and a new arrangement. Pegboards adapt quickly. You just rearrange the layout without drilling any new holes in the actual wall.
A simple metal rail works just as well for a small space. Screw a kitchen rail to the wall and add basic hooks. Hang small metal buckets from the hooks to hold supplies. This takes up very little space and works perfectly in a tight apartment craft corner.
Magnetic strips offer another smart wall storage trick. Mount a heavy-duty magnetic knife strip above your desk. Hang metal rulers and small pliers on the magnetic strip, where they stay visible and easy to grab, and keep craft blades out of reach of kids and pets.
Clean up the room in a few minutes after working
A craft room gets messy fast. Establish a strict reset routine at the end of every session. Spend a few minutes putting things back where they belong. Do this even if you plan to return the next morning.
Running through a quick sequence stops the mess from taking over.
- Throw away paper scraps and small bits of trash immediately.
- Empty your small desktop trash can into the main house bin.
- Put the caps back on pens, markers and glue bottles.
- Wash out any paint brushes and leave them flat to dry.
- Put the hand tools back on their designated wall hooks.
- Slide your project tray onto its resting shelf.
Sort loose pieces of paper back into their proper folders. Wrap tangled embroidery thread back around a rigid spool. Wipe down your cutting mat or glass desktop with a damp cloth to remove dust. Taking care of your materials can extend their life.
This short routine stops small messes from piling up. Simple habits make your small home upgrades feel good every single day.